Are you ready to put the pen and pencil to paper, and make an easy bear drawing with me?
It is very doable for beginners since we’ll go over every part in the step-by-step tutorial below, complete with pictures. This doesn’t take away from it also being a fun doodle for more experienced artists to have a go at.
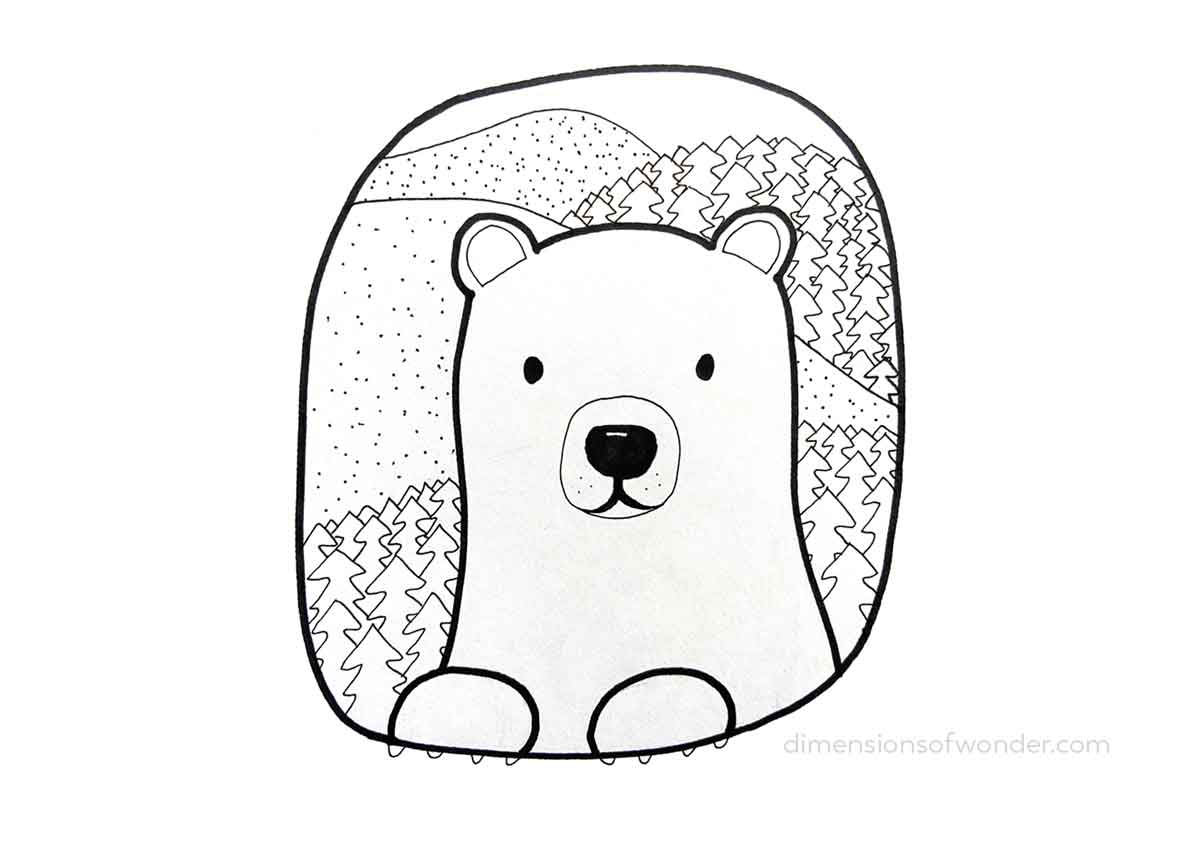
I had a real blast making this cute bear face pop up against a backdrop of rolling pine-forest-covered mountains.
Table of Contents
What you’ll need:
- paper, any kind will do.
- a pencil.
- a good eraser. (Perhaps, not the one on the back of a pencil, like the one I’m using in these pictures. This one happened to perform well but in my experience erasers on the back of pencils are often sub-par and at risk to stain the paper. A typical case of ‘Do as I say but not as I do.’)
- a Sharpie marker.
- a black fine liner. (Sakura Micron pens are awesome.)
This is an easy bear drawing of mostly just a bear’s head against a backdrop of rolling mountains. That’s because drawing the bear’s body is a whole other level, and I wanted to make a fun drawing of a bear showing easy steps – great for beginners – without worrying about getting all those other proportions right, or where the front leg and back leg attach to the sides of the body.
The easiest way for novice artists to have fun with a simple bear drawing is to drop everything below the shoulders and focus on the head of the bear!

In whichever order you prefer, start by drawing the outline of the picture, the bear’s outline, and the bear’s front paws. Use the pencil to make lots of tentative shapes, as seen below.
We’re not concerned with small details such as their thick fur or sharp claws. Only the bear’s ears are a part of this round.
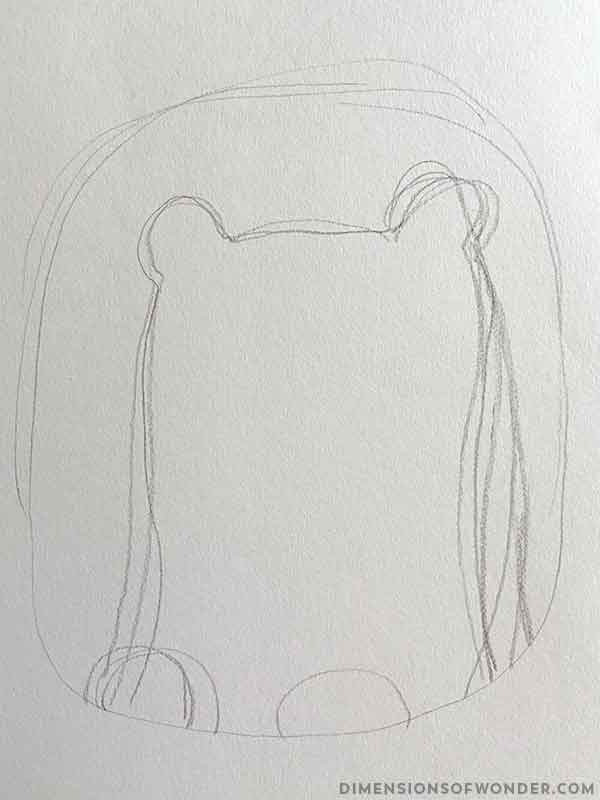
Unless you nail it with your first go, this is the time to search for what looks ‘right’. Don’t be afraid of these sketch lines. Just try different ones until one of them pops out as “the one”.
The backdrop fits into a sort of large oval shape, with slightly squared corners. Each front paw is just over half of a smaller oval, a rounded shape along the edge of the frame.

There may come a moment when you can’t see clearly anymore. Too many tentative lines? That’s what I had on the right side. And it took a few tries to get the half circles for the paws right, too.
Sometimes, all you need is a fresh start. With a pencil, that’s no problem. Starting with a pencil sketch is an easy way to explore various versions of your drawing, before committing to a certain result.
Notice how the mountains run straight through the top of the bear? It ensures they make sense, and those small lines can easily be erased later.

Next step: filling the forest with trees. Two of the mountains behind our bear are covered in pines. Or firs. Some coniferous trees. To make it look natural, be sure to start with the trees that are in the front, near the bottom of the picture.
Then, fill up the row behind those, behind those, and so on. Each next area can be ever so slightly smaller than the trees that are closer by.

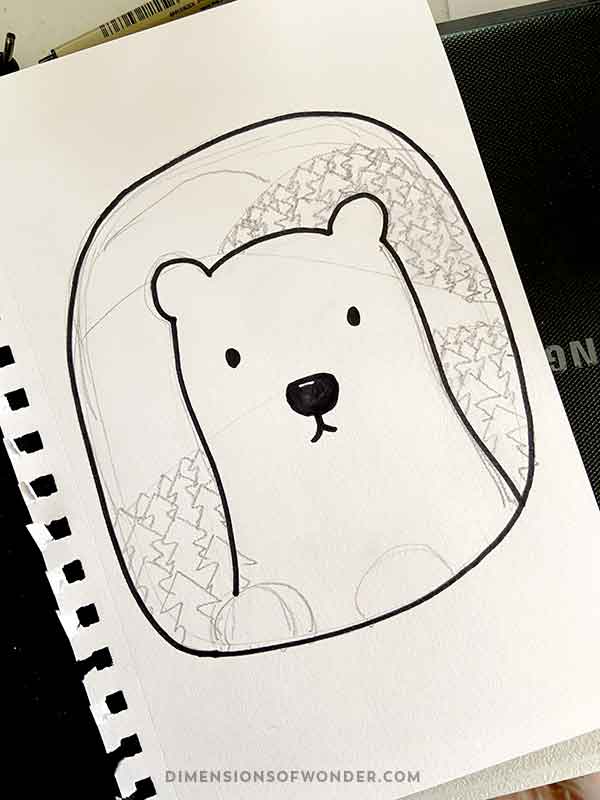
Do you know which one of the penciled lines you’ll follow for the shape of the bear? Trace that one with a Sharpie or thicker black marker. It’s a little bit tricky to do the bear’s outline first – in retrospect, I’d probably do the outer edge before the bear, to make sure everything else is contained by that outer line. But both work.
Give the bear a face, too. Eyes, nose, and mouth. (If you’re unsure about winging it, there is no shame in trying a few eye and nose placements in pencil first!)
You can leave a little piece of white untouched when coloring in the nose, to portray the reflection of light on the bear’s wet snout.
Drawing the outline of our little woodland see-through can be tricky. If the ends don’t meet (in this case, mine came together perfectly – hooray) you’ll have a few options.
- embrace the imperfection and don’t make a big deal of it
- start a new drawing – maybe even do the black outline before everything else
- make the outer border thicker to cover up the glitch
- touch up the messy part later on with Photoshop

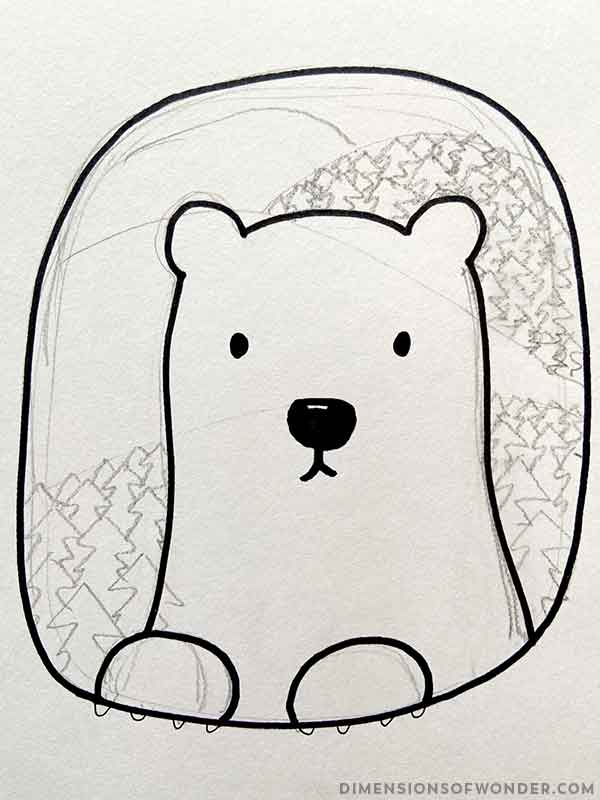
Now, draw the front paws. With a fine liner, add the nails on the outside of the ‘window’.
This – below – is what we have so far. It’s starting to look like something, isn’t it? I wasn’t too pleased with the nose and mouth but decided to roll with it for now. In the end, it turned out to be a cute sort of lopsided snout, which gave him a bit of personality.
It’s time to switch to the black fine liner.

This is what we’ll use to trace the trees. In the same way as when drawing these with a pencil, start with the largest, closest one(s). Then, the ones just behind those, and so on.
That way, you won’t be bothered by random pieces of tree that should logically speaking have been hidden behind the ones nearby.

Still with the fine liner, bear is getting his snout completed. (And again, penciling it first is a great way to proceed.)
The line runs from one corner of his mouth upward, over the nose bridge and back down to connect with the other mouth corner.
Fill in the ears with a thin line too.

Use the precision a fine liner offers to make the transition between the thick lines and the thinner ones at the mouth corners a bit more gradual.
| More Drawing Practice Ideas Right here: Cute Beginner Drawing Ideas For Free Spirits (Or anyone who wishes to unleash their creative side, really!) Also, here: Cute Easy Things To Draw Or here: Rose Drawing How-To (Easy Step-by-Step Tutorial) |
Finish up the bear’s face with a chin line right that follows the shape of the rest of the snout.

I like his style!
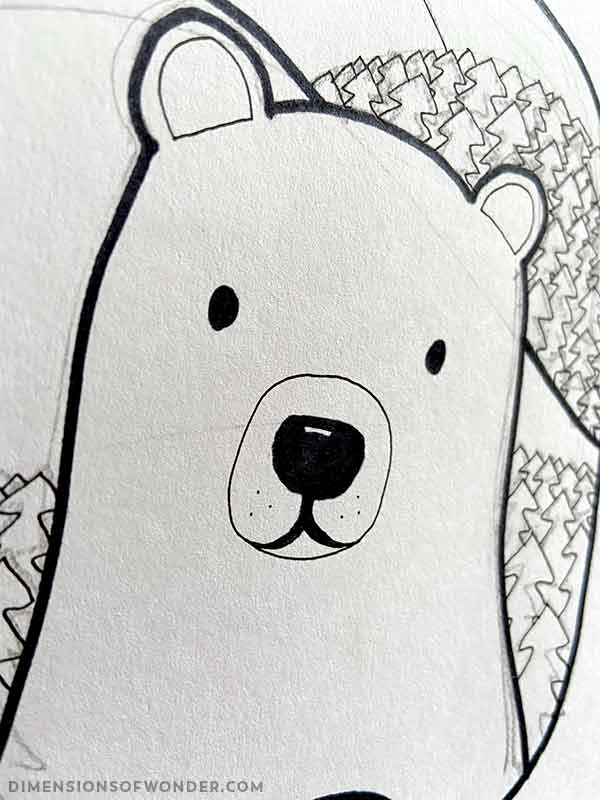
Add a few tiny dots where he might have a few whiskers, or just freckles.

Last, but not least, the two mountains that aren’t covered in pine trees are given some texture with little dots. As tempting as it is to rush these dots, going fast can easily lead to the dots becoming stripes. So slow and steady it is… kind of like an excercise in Zen.

We’re almost done. Time to put the cap back on and grab an eraser, to get rid of all those pencil-sketch marks.

Hello, handsome! Isn’t he cute?
I hope you enjoyed this quick tutorial and had fun following along with the step-by-step instructions was relatively easy to do. (And don’t forget to add our bear drawing to one of your Pinterest boards!)
A bear is an amazing creature.
With that said, I haven’t been able to shake the image of bears ganging up on a poor wolf in the Netherlands, where they shared an enclosure in a wildlife park. Even a cute teddy bear hasn’t looked the same to me ever since.
The wolf’s pack mates tried their best to save her but given the bear’s enormous size, they didn’t stand much of a chance. Bears may be beautiful creatures, but between the canines’ fascinating pack dynamics, and the debt we owe dogs for their tireless work over the centuries as well as extreme loyalty, I am #teamwolf all the way.
Not quite done drawing? Check out this short tutorial How To Doodle A Cute Striped Cat (Step-By-Step), Cute Doodles To Draw: Ideas, Inspiration & Tutorials, or take to the world of plants and Doodle Flowers.
Easy Bear Drawing: Pin It For Later


