This drawing tutorial outlines the steps of how to draw a violet flower. A violet flower illustration is lovely and makes for some cute art!
We’ll break it up into easy steps, to make this fun: Firstly, a light pencil sketch, followed by a simple line drawing. Before wrapping things up we’ll use the same black fine liner to add some detail. This makes the violet flowers stand out nicely against the background.
And you, of course, don’t need to stop there. If you’re in the mood to grab some color pencils, you’ve just created a beautiful botanical coloring page! (That’s just one of the things you can do with botanical drawings.)
Table of Contents
There are lots of drawing tutorials online – in general, and even on how to draw a violet. Some are short (five steps or less), some are meant for kids, some are all about color, and some focus merely on the shape.
I wanted to add something completely different here. It has a lot more steps than most and the end result is a delicate, dainty line drawing.
Even though the focus is more on the use of fine lines than on the breaking down of each exact step of the initial pencil sketch, this tutorial should still be very doable for an enthusiastic beginner.
Let’s get drawing!
How to Draw a Violet
For starters, you’ll need a piece of paper or a blank sketchbook page and a pencil. The mechanical pencil seen in these pictures is not what I normally like to grab (the basic 2B pencil is hard to top for sketching) but it worked out.
If you do use one of these, make sure to go extra gently on the pressure. While the pencil marks can be erased, the creases left by the sharp center will remain carved into the paper.
Ready for the first step?
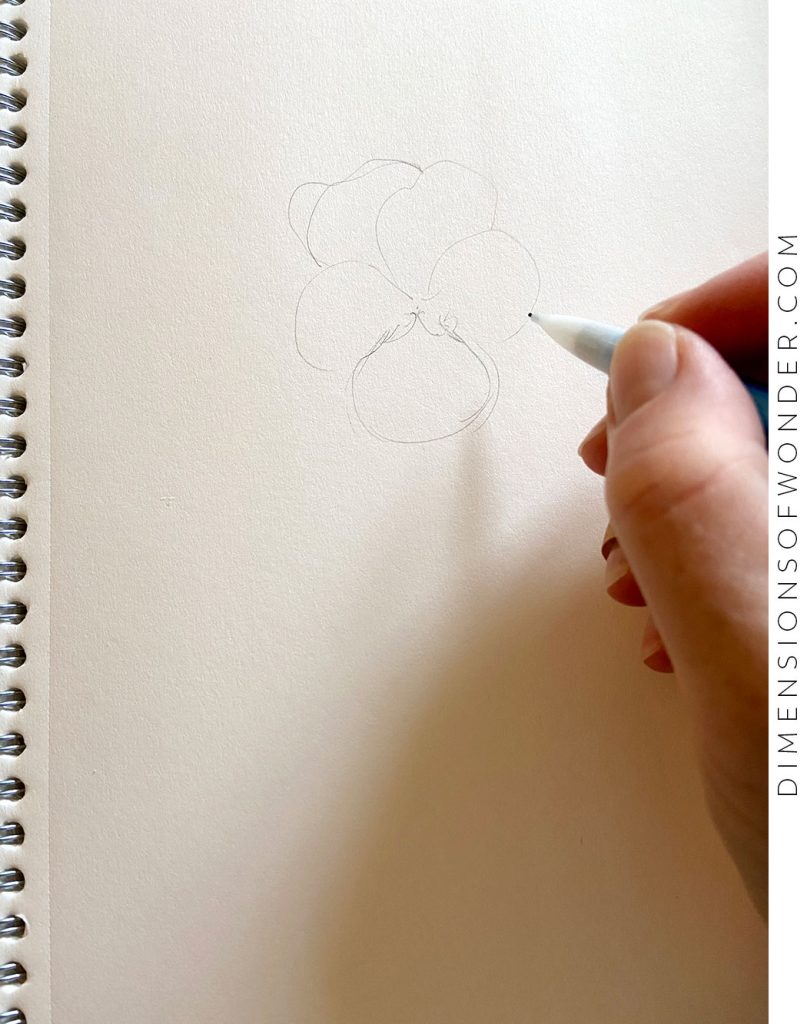
Step 1: Violet Flower Pencil Sketch
Begin with the very first violet flower shape outline. There are five petals that come together in the center.
Each of them is basically a curved line that ends at the same point it started – the center of the flower – all while featuring a few irregularities along the outer edge.
What works well is to draw the bottom one as the first petal, add the two side petals, and then fill in the top of the flower.
It doesn’t matter where on the paper this first violet flower goes, as we’ll be adding a few more to fill out the composition.
Your composition does not need to look like mine, as long as you make an arrangement that looks balanced and nicely spaced out.
Nature is all about growing randomly, so it should not be weirdly symmetrical or look too posed, either.
This is how it looks with a few more flowers, leaves, and stems.
It’s a rough draw – anything can be erased and replaced.

Take a step back and see if you like your arrangement. If not, re-do a few things, or make a new sketch. It’s all part of the process.
Here’s my example.

One of the flowers is seen from the side. That profile view changes it up nicely and is even easier to draw than the full-frontal violet flowers.
Three petals and a small bell-shaped bud.
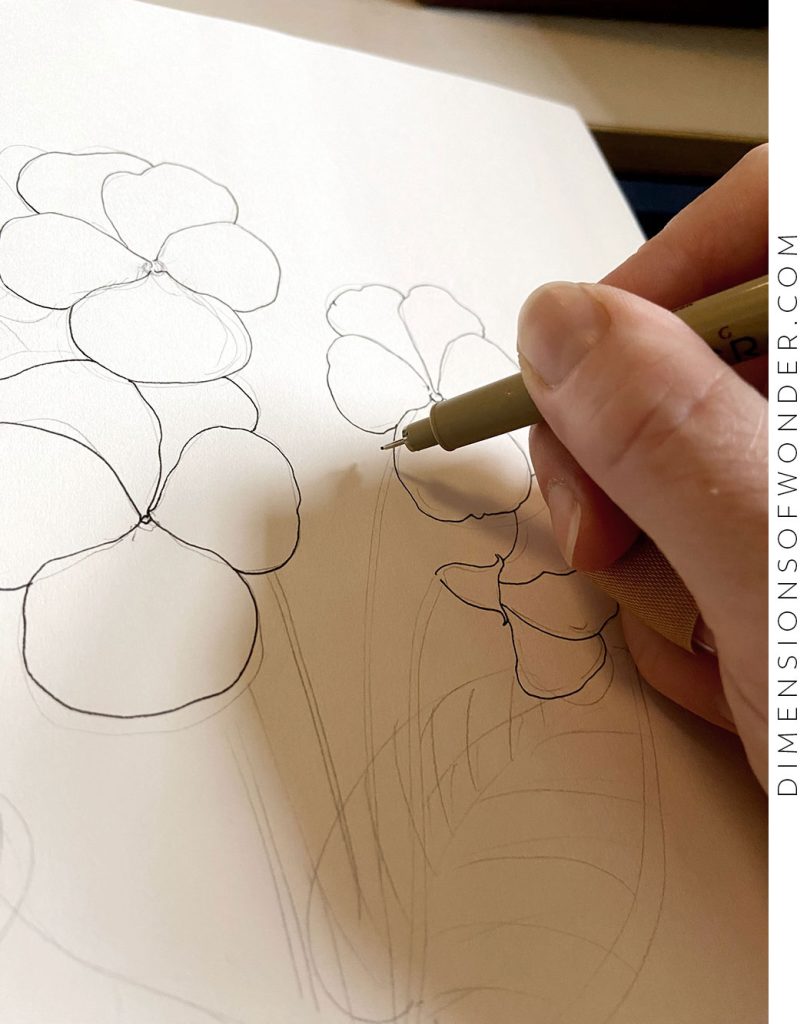
Once you’re relatively happy with the violet flower pencil drawing, it’s time to switch the pencil for a pen, such as this one: Sakura Pigma Micron 0.1.

Step 2: Violet Flower Line Drawing
No surprises here, as we merely follow the previously outlined flowers, leaves, and stems.
Focus on following the correct pencil lines with the fine liner. If it’s gotten too confusing, and there are a lot of sketch lines, it can be helpful to erase some of them before starting the tracing.
Even when knowing full well which line you mean to follow, it can still be tricky to not wander off and veer to the side.
However, drawing a violet flower is quite forgiving in that the scraggly edges are you friend. Later on, for the stems, it’ll be all the more important to achieve a straight line.
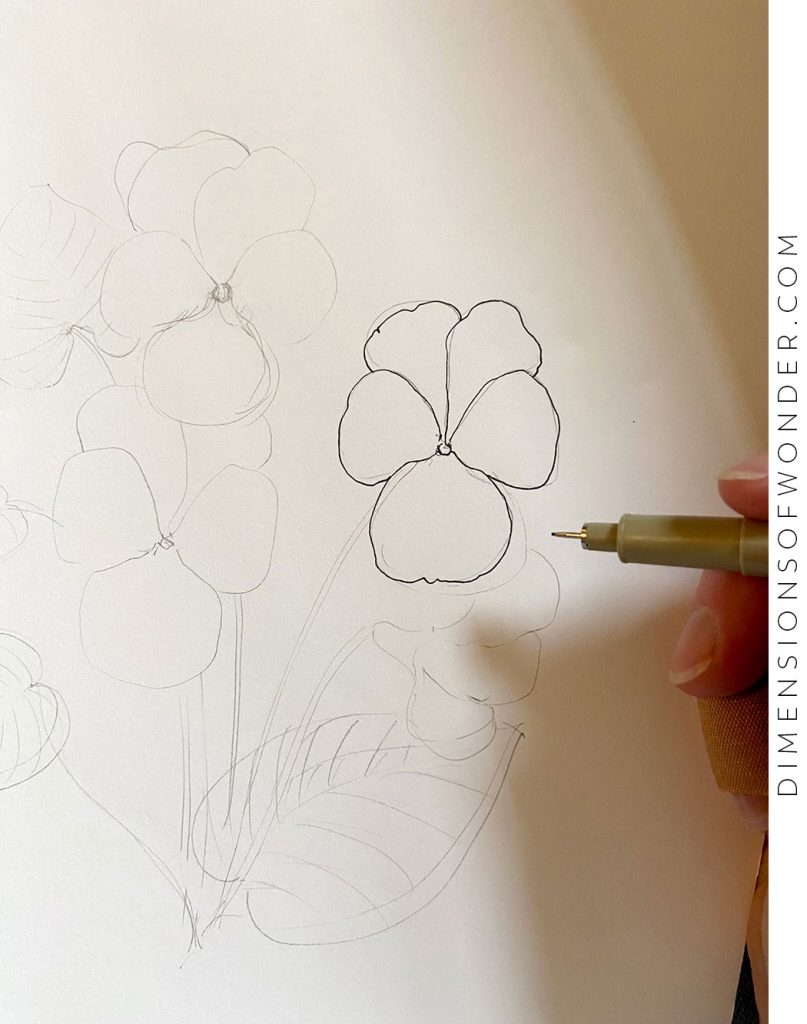
Since pen lines don’t erase, it is crucial to start with the petal in the most forward position. That’ll be the bottom one, like this.

Adding one on the right side, with one edge tucked a little bit underneath the bottom petal.
On the other side, same idea. Remember that asymmetry is our friend and these details do not need to be even. In fact, it would look odd if mirrored to perfection.

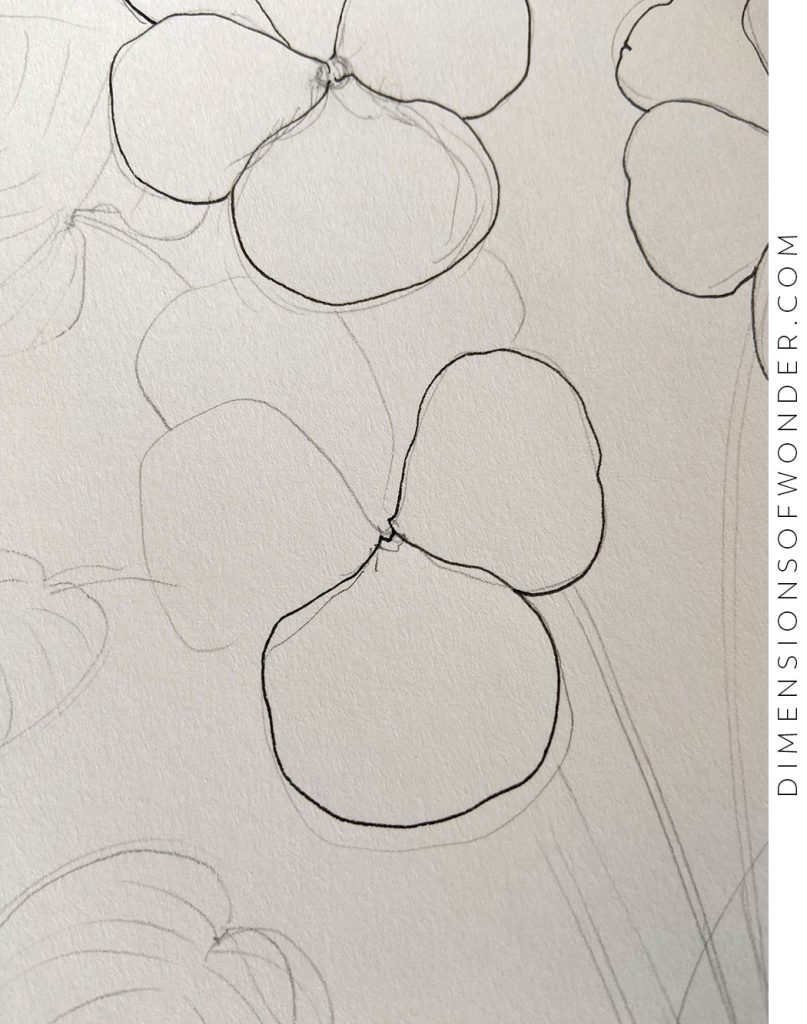
And with the top two petals set in pen, we now have a nicely-shaped violet flower. Rinse and repaeat. The only one looking different is the one seen from the side.
For that one, start with the bell-shaped base.
Now, we start with the top petal, because that’s the one that is placed the furthest back… so when seen from the side, it actually lays on top of the others.

The middle petal fits nicely underneath.

And with the bottom petal added, this oddly shaped flower is now done, too.

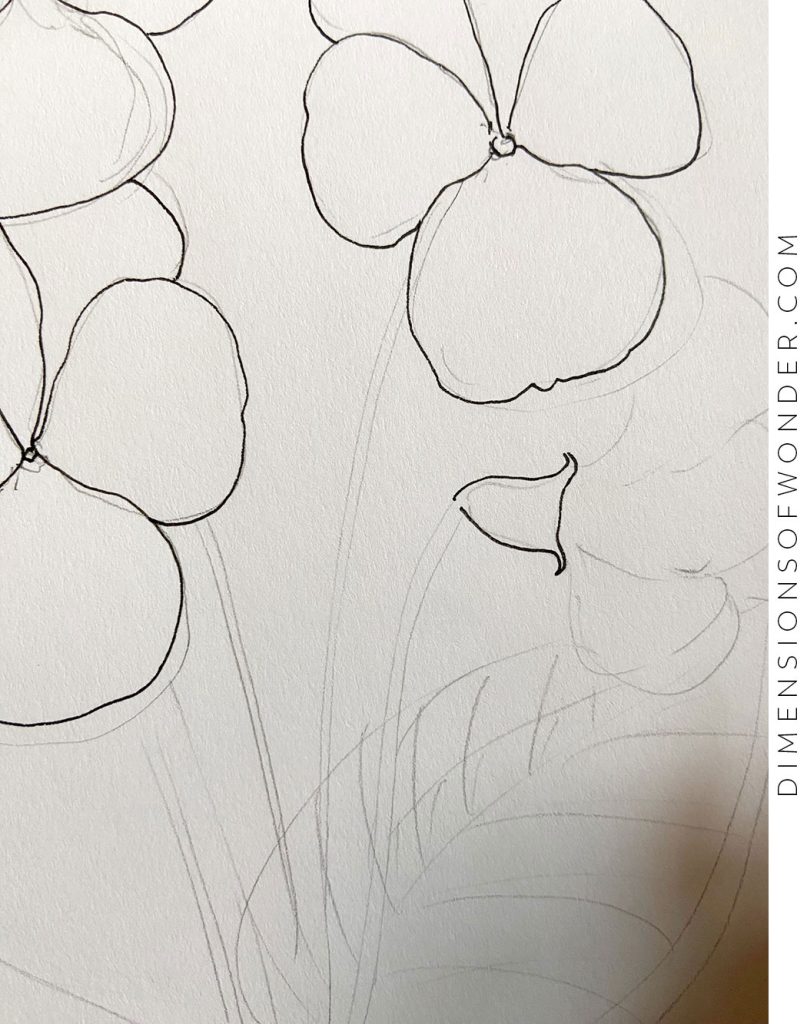
Step 3: Tracing the Stems & Leaves
The tracing of the leaves and stems comes with the same kind of paying attention to what exactly is in the forefront, and remaining consistent throughout.
While the edges of the violet flowers looked nice and organic with ever-so-slightly frayed edges, the stems need to be near perfectly straight to look natural.
It makes a big difference to properly rest your hand before setting out on the pen stroke. Try a few dry moves to make sure you’ll be able to cover the entire distance of one stem on a single move.
I chose to do these three stems first, meaning every other leaf or stem will be meant to go behind them.

There are many different types of violet flowers! More than I knew of – to say the least. Look it up, and you’ll come across various shapes for both the flowers and their leaves.
I went with a rounded leaf, which some of the violet varieties have, and it has a small indentation where the stem comes in. Other than that, the goal is to have fun drawing and take some liberties with reality.
The veins come together at the stem, instead of branching off of the central vein, as is the case with certain other leaves.

Below is a close-up of my best attempt at leading the leaf outline behind the stems, without looking all staggered. It’s a little tricky – sometimes, an additional pencil line can help to keep track of where the line should go in order to look accurate.
Tip: Use another piece of paper to practice longer strokes. Do you find it easier to draw a horizontal line or a vertical one? Turn the paper if needed, if that helps to draw a smoother line.

Step 4: Adding Detail to the Violet Flowers
The next part is at the same time very rewarding and very tedious.
Rewarding, because it’ll give the violet flowers more depth and make the entire drawing come to life. Tedious, because holy cannoli – how many little lines can one person draw without seeing double?
Just kidding. Sort of. It’s a little tedious alright, but also weirdly meditative.
First, define the centers of the flowers a bit more, and add a few small lines that will become the characteristic marks some violets have near their center.


They don’t have to be the exact same in each flower – ballpark will do.
in the picture below, I’m working on the first details in the flowers. It also gives a nice overview of the veins in the leaves, which we haven’t revisited past the pencil stage.

Then, finally, time to add some punch to those pretty little violet flowers.
With the same 0.1 black fine liner, start drawing thin lines very close together, from the outside of each petal inward.
About halfway, naturally release the pressure to fade the line and the pen lifts from the paper. Keep making that same movement until one petal is done, then move into the next.
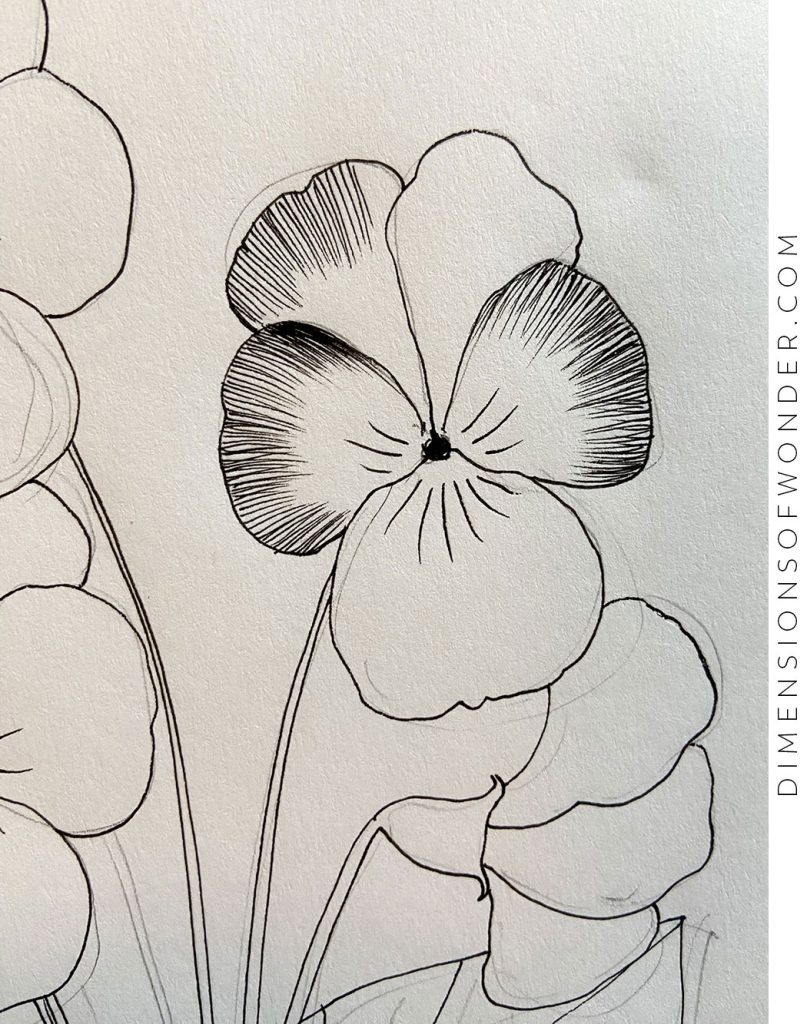
For a darker effect, it takes a few passes and multiple layers of thin lines. Starting from the sides, top, and bottom of the petals, work and re-work the same areas until finding them dark enough to your liking.
Here is how the first violet flower drawing looks when done. (Well, almost.)

See how nicely it pops off the page? Good motivation to keep at it and repeat the process for the other three flowers.

Once you’ve got to the level of shading you’re happy with, it is quite possible that the outside line of the petals needs a little re-defining, and that’s alright. You can also add a bit of shading – in the form of more of the same fine lines – to the center, as well as increase the thickness of the marks in that area.

This picture shows even better how each thin line naturally fades halfway through the petal.
Where the violet flower touch or overlap, you have to decide which one becomes the darker one. It can be the back (due to shade) one but it doesn’t have to be, as violet flowers come in an array of hues. Maybe the flower in the background happens to just be a lighter-colored one.

That was a lot! And here is the final drawing, properly scanned in and ever so slightly touched up digitally. (By touched up, I mean the contrast and brightness, that’s all.)
You’ll notice a few final touches below as well: a few lines to define the base of the violet flower seen from the side and the darkening of some stems, to give the drawing a bit more contrast overall.

One last close-up.

And that’s how to draw a violet flower (with a whole plant attached to it) in pencil and pen. Give it a try, or find your next new art challenge while exploring some of the other drawing tutorials!