Are you ready to draw some roses? Many see a rose as the queen of flowers. Whether it is your personal favorite or not, a rose certainly counts as a beautiful flower.
Such an intricate piece of art, created by nature itself. And drawing one can be a little bit daunting!
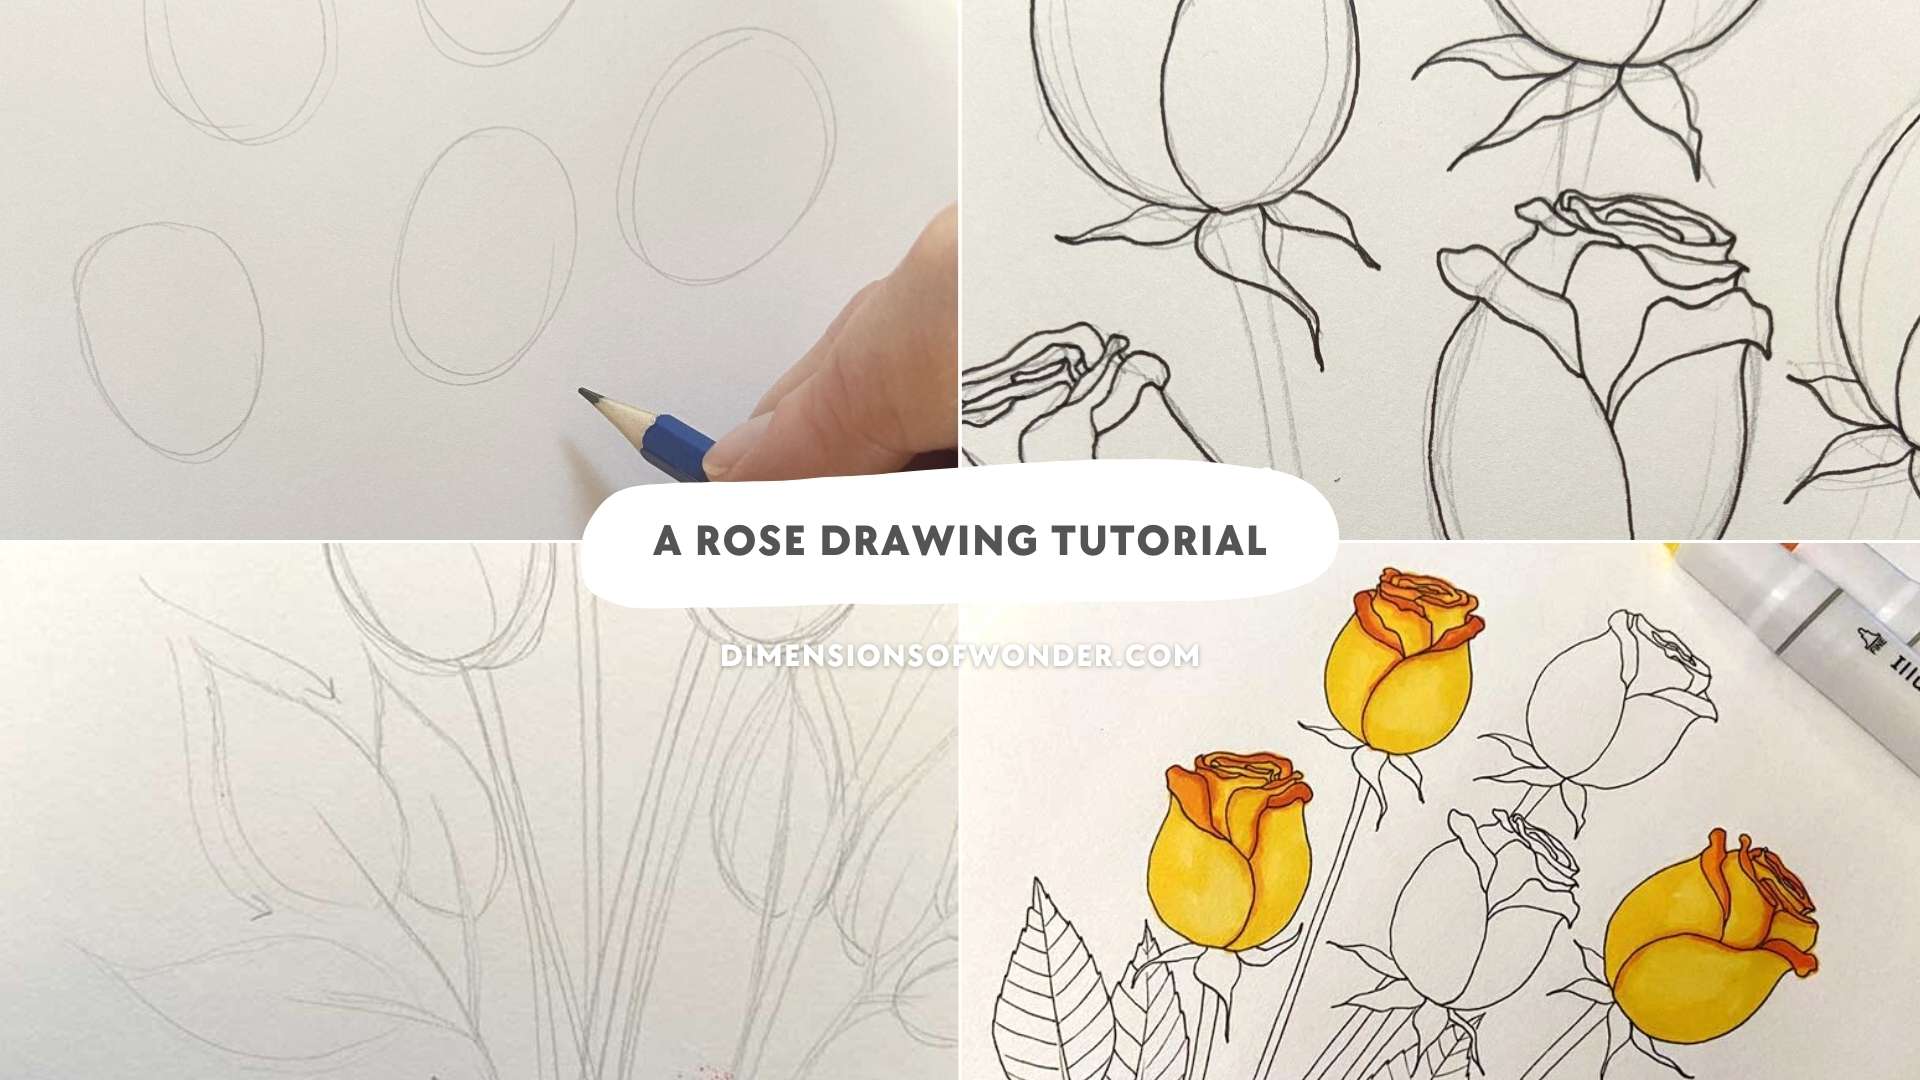
It does not have to be if you break it down in easy increments. Here is a step-by-step rose drawing “how-to”, a tutorial with lots of pictures.
The skill level for this rose tutorial is anywhere from beginner and up.
The steps are relatively simple on their own. We will work slowly but surely toward getting a beautiful rose flower on paper.
Or five… Or however many you feel like adding. Complete with a stem and a leaf or two. The final result can either be a pen drawing or a rose in full color.
These roses look fairly realistic, despite the fact that they are simple and fun to draw!
Materials & Supplies
We’re starting out with a pencil to sketch some basic shapes. Once the shapes and details are clearly defined in pencil, we switch to a black fine liner.
Adding color at the end is optional. I experimented with some illustration markers, though the pen rose drawing stood quite strong on its own.
And I made sure to scan the pen drawing in first. That way, I have my own coloring page and can try out a few different versions or colors later – either by hand or digitally.
Here’s what you’ll need to work through this rose drawing tutorial.
Basic Supplies
- a sheet of paper (or a blank page in your favorite sketchbook, or possibly watercolor paper if you plan on adding color that way)
- a pencil – or more than one, for shading, if you’ll be finishing the roses with pencil shading
- an eraser
- a sharpener, if needed
- black fine liners, such as Sakura Pigma Micron or Staedtler Pigment Liners.
Optional, for Color
- illustration markers
- colored pencils
- pastel crayons
- watercolor paint
- or any other material you like to work with
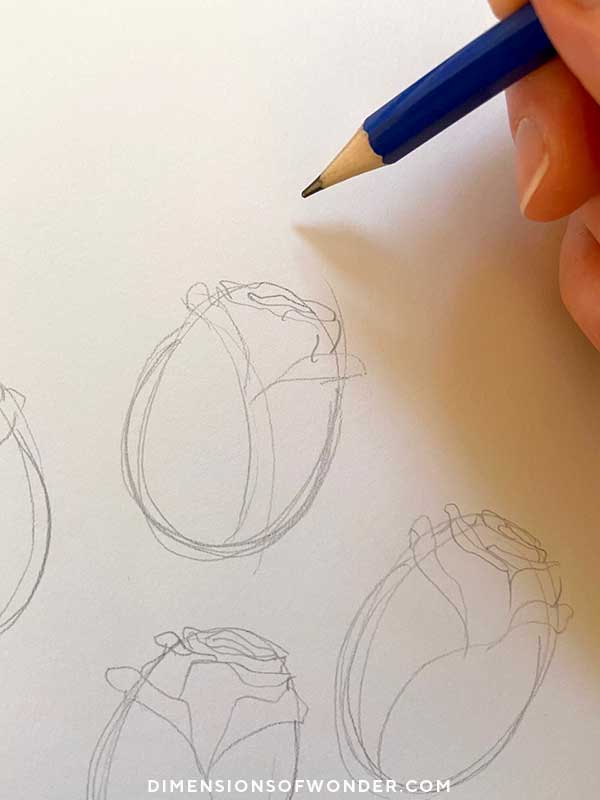
First Step: Simple Shapes
We’re going to start with some very simple shapes. Think of them as construction lines.
If we were drawing the top view of a rose, we would make circular shapes. For this tutorial of roses that are barely open, an egg shape is more useful.
Like this:

Now that you have the oval shape showing the placement of each rose head, draw two thin lines at roughly the same height, defining a u shape.
Imagine a center line, going down the oval – or you can draw that one too if it helps.
The small lines are going to define where to start the first set of petals. These are the outer petals of the rose. While they will have a somewhat irregular shape, it helps to have them be close to the same size, which is where these helplines come in.
Later on, you’ll have ample opportunity to veer away from them and add some life-like frills for a more natural vibe. Because nature does not do perfect symmetry.

It is time to use curvy lines to divide each rose into two halves, up until the little helplines. (Some of the ovals in the picture above already showed these individual petal lines.)
First, draw the two curved lines. Next, add a little frill on the top edge.
It does not matter whether you do the left side or the right side first. Whichever side you draw first will be going all the way down. The second side then fills in the remaining space, the bottom part hiding behind that first petal.

And with that, the left and right larger petal of each rose is done!

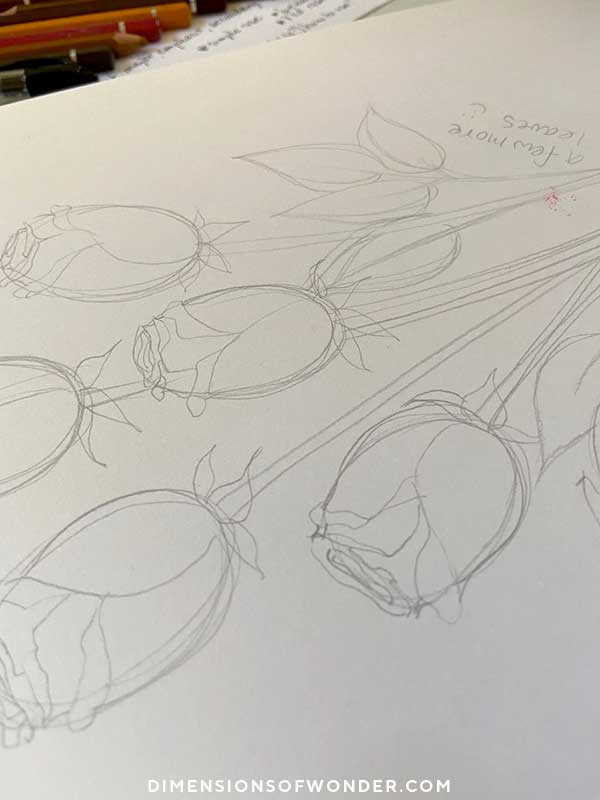
Take that same approach one layer inward, to add those petals that live on the second row.

See how with a few easy steps, it is already beginning to look a lot like a real rose?
Center of the Rose
We definitely don’t want each rose to be an exact copy or clone. That would not look very realistic, not interesting.
When working inward toward the center of each rose, the aim is to draw the inner petals using organic lines as you get closer to the center point.
For a more realistic look, this may mean that some roses get only two or three visible layers of petals, while others get a few more. Each one is unique.
Since we’re also trying to have a little fun here, try to relax into the scribbly motion going inward. Get a feel for the motion and almost let the pencil decide where it wants to go.

For the stem of the rose, you can experiment with a slightly curved line. I find a mixture of curved lines looks nice when drawing multiple roses.
While these are various degrees of vertical lines, totally straight lines are a no-go. That would look rather odd and ‘robotic’.
To create a sense of cohesion, as is the case with a bouquet of roses, you can aim all of the stems in the same direction. As if they are held by an invisible hand or rubber band.

It is time to give the stem of the rose leaves.
The first line, going upward from the stem at an angle, is the center stem. In a similar motion, add a few smaller stems for the leaves to the left and right.
Then, from the pointed end downward, draw the shape of each leaf, ending at the middle line.
And finally, add some light lines to show the nerves or veins.

Rinse and repeat as many times as you see fit.
Additionally, add the last details, such as those small leaves that pop out from under the outer layer of rose petals.

Each of my rose’s shapes is actually very similar. You could vary the angle of the head some more.
While the center of each rose is unique, we could be looking at these roses from very different angles to accentuate that even more. The bend of each stem might give every flower its own angle. Which in turn would mean different views of the top.
Switching up the angle is not part of this step-by-step guide, but I may do another easy tutorial on that in the future.
Now, let’s switch to a fine-tipped pen to clearly define the rose’s shape.

In order to not be stuck with sloppy-looking little “loose ends” in later steps, in spots where we don’t want them, start with the pen by tracing the outer layer of petals. Then, move on inwards.
That is how whatever needs to be neatly tucked away behind other petals, will be.

Isn’t she a beauty?
I am very fond of this particular rose. I think I’ll keep her around and tame her, just like the little Prince did.

The leaves have small dents, or rather a little sawtooth edge.
I always have to force myself to not go too fast and concentrate for a minute there. If I get sloppy, my brain often makes a sudden whirr, five dents in, and before knowing what happened I’ll have a dent facing the wrong direction.
Even one tiny sawtooth facing the other way messes up the entire leaf. Nature never makes that kind of mistake, and we instinctively know it does not make sense when we see it out of the corner of our eye!

And we’re almost done drawing roses!
This means you can now carefully erase the pencil lines.

Final Steps
Next up is another super fun part: finishing the drawing. This is the final step, where your initial sketches of roses will come alive and look ready to jump off the paper!
1. Finishing With Copic Markers
I wasn’t quite decided on which color to use and started the first rose – not entirely convinced – in yellow and orange. However, it popped so cheerfully that I had to add some more.
With alcohol-based illustration markers or Copic markers, the first color to use should be the lightest one. Similar to watercolor paint, you can never get rid of anything darker, so we need to proceed gradually and thoughtfully.
For color inspiration, there are plenty of pictures showing different colors to browse online. Such as these classic red roses – the universal symbol of love – and romantic pink ones. Browsing such a site of a florist is a great place to scope out color options… Mauve, white, delicately blush pink – they have it all.

2. Finishing As A Line Drawing
Line drawing art is awesome. Simple and elegant, sometimes undervalued. It does not have color or shading, so all attention goes to the shape and details.
Another beautiful way to finish your rose drawing is by adding even more details with an even thinner black fine liner.
3. Finishing In (Graphite) Pencil
If you’ve chosen to make a rose pencil drawing, you may even want to skip the fine liner. In that case, instead of adding color, use pencils to add shading.
I’ve printed out that scan I made of the pen drawing, before coloring it in with markers.
The pen lines are visible so it is technically not a full-on pencil drawing. Guess I could draw make a new drawing to experiment with graphite pencil shading.
Remember: pencils are labeled with the letters H and B, as well as a number. The number goes up to 6 for each letter.
H stands for hard, 6H being the hardest. Those pencils are used for lighter shades. B stands for black, and they are used for darker tones. HB is right in the middle, a softer pencil but with some hardness to it still. For that smooth velvety shading in darker areas, you’ll want to grab a 6B.
Using colored pencils is, of course, an option as well.
4. Finishing With Watercolor Paint
This tutorial focuses on the drawing of a rose, not painting.
However, if you’re comfortable using watercolors, that is a great way to add color.
Even if you have no experience, give it a go and try drawing these roses on watercolor paper. You’ll definitely want to use special paper in order to set yourself up for success. Regular paper won’t do, because it gets wrinkly, being that it is too thin and not as absorbent.
| Tip: Check out this post on the best watercolor paint sets for both beginners and seasoned artists. |
Even though this is a more realistic rose drawing, that does by no means mean that you are required to follow the same style all throughout.
This is your art!
You decide.
Mixing genres is a real blast. How about taking that pen drawing (made with water-fast liners) and going wild on it with swashes of watercolor paint? Let them bleed into each other and marvel at the unpredictability of the medium. Or cringe… in which case, back to square one on the drawing board it is.
Conclusion
With that, I hope you’ve enjoyed the step-by-step tutorial for a rather realistic rose drawing.
Roses do also lend themselves really well to some fun, free-flowing doodle art. One of these 10 Simple Flower Doodles is a rose. Note how it basically consists of seven-ish lines. That’s it.
You can veer away from realism quite a bit, and still have your doodle undeniably look like a rose, due to some distinct features such as color, and thorns. (Which we did not add… Guess the ones here are from a high-end florist, or it could be a genetically modified strain.)
Next time, shall we tackle a rose seen from the top?
One of those opulent, poofy ones, with so many petals you can’t see the center.
Or maybe a wild rose, those are beautiful too.
Did you know roses are the most popular flowers, followed by tulips, sunflowers, daffodils, marigolds, daisies, orchids, and carnations?
If you have a great idea for one of the next drawing tutorials, request it here.
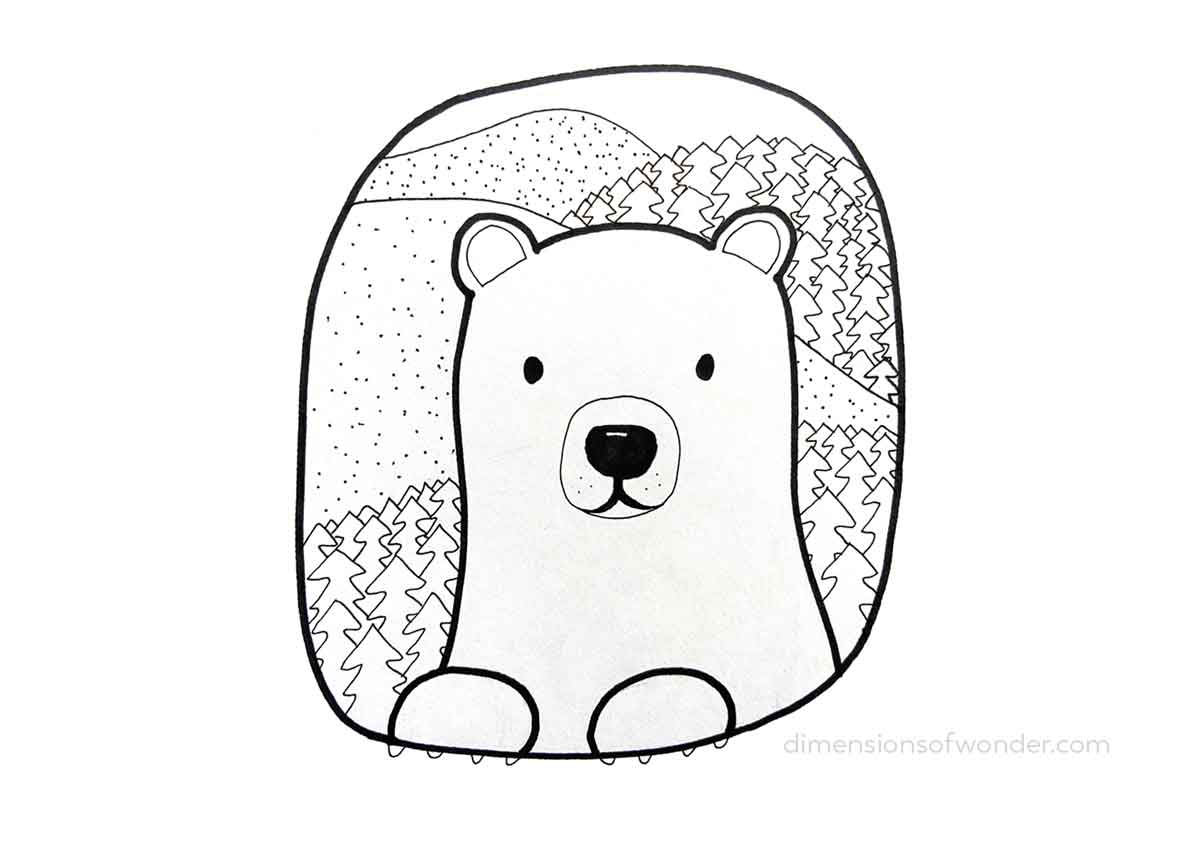
| Not quite done drawing? Check out these posts for more ideas, inspiration, and tutorials: How To Draw A Mushroom 20+ Easy Doodles To Draw When Bored; The Circle Challenge! Easy Bear Drawing (With Step-by-Step Pictures) Cute Easy Things To Draw 15+ Fall Doodles: Vibrant Pops Of Color & Cozy Vibes Galore 27 Cute Beginner Drawing Ideas For Free Spirits |
Save This Rose Drawing How-To Tutorial
Before wrapping up, here are some nice images to use on Pinterest.


Thanks for reading – I hope you are pleased with the end result and – perhaps even more importantly – had some fun in the process.